
Getting Started: Design Guide
Navigation
▪ Reading Your Geno ▪ Base Colors ▪ Nuances ▪ Adding Markings ▪ Finishing Touches ▪ Position ▪

Step 1: Reading your Geno
For this guide we will take a look at this geno for our example!
|
• Female - Standard - Standard Coat
• Ivory with Rose • Markings: Freckled, Merle, Underbelly, Throated • Mutations: • STATS: | HP: 37 | STR: 27 | SPD: 23 | DEF: 24 | PER: 50 | VNM: 33 | |
• This line tells you your reeepuls Sex, their Build Type, and their Coat Type
• This lists your reepuls Skin and Coat Color. These are always listed in order and cannot be interchanged. • This lists the markings your reepuls has. • If your reepuls has any mutations, they will be listed here. • And your reepuls STATS. These do not play a part in the design of your reepuls. Instead stats are important in our battle activities! |

Step 2: Base Colors
|
Let's first get familiar with the color swatches! You'll see that each color swatch is made up of 3 sections.
|
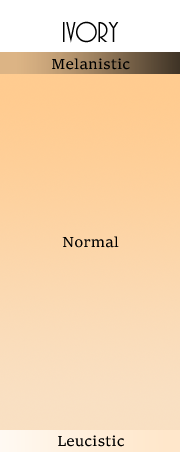
|
So for our example, our geno's base colors are Ivory with Rose!
This meaning her skin color will be Ivory, and her coat color will be Rose.
This meaning her skin color will be Ivory, and her coat color will be Rose.

|

|

|
Step 3: Nuances
Base colors may also have subtle nuances and/or a gradient where the Skin and Coat colors meet.
Nuances should always be chosen from the same color slider as the base color.
Nuances should always be chosen from the same color slider as the base color.
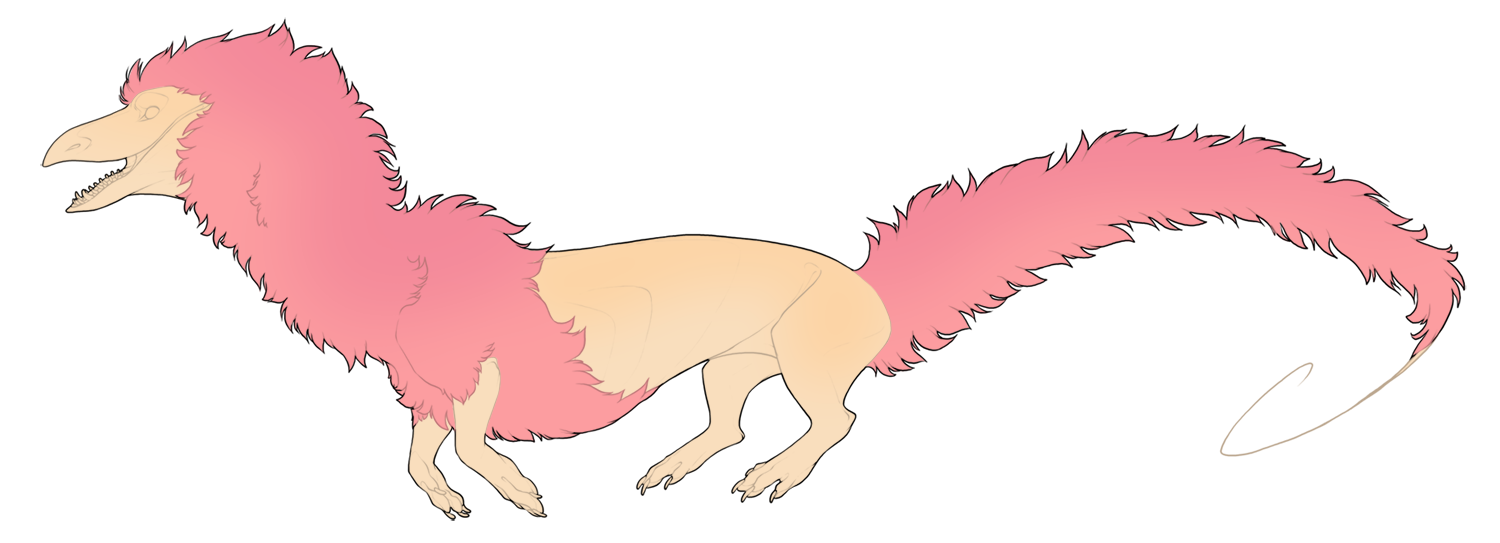

An example for acceptable nuances, showing the coat color fading into the skin color!
|

And again, this time with the skin color fading onto the coat!
|
Nuances should NOT
• Be chosen from a different portion of the color swatch than the base coat.
• Mimic other markings such as Points, Fade, Ventral, or Dorsal.
• Be chosen from a different portion of the color swatch than the base coat.
• Mimic other markings such as Points, Fade, Ventral, or Dorsal.

These nuances are too dark (chosen from the Mel Slider), and instead are resembling the marking Dorsal.
|

These nuances look like the Points marking.
|

This reepuls has both base colors bleeding into each other.
Blending nuances may only go one way! |
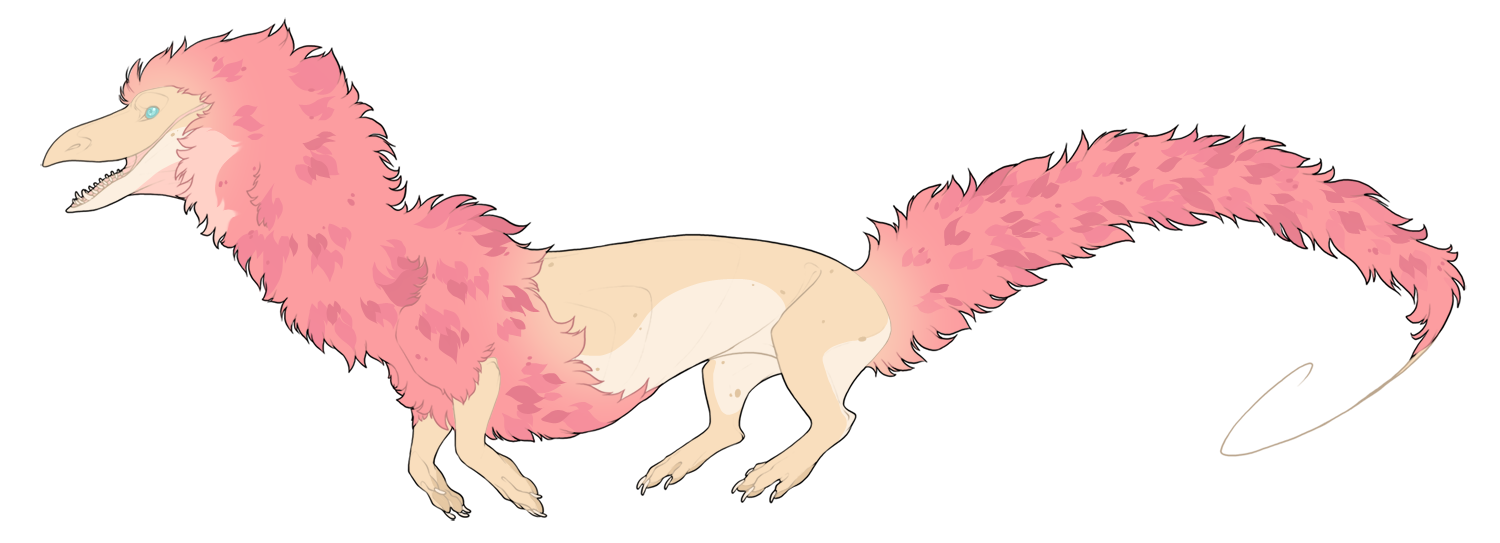
Step 4: Adding Markings
Our geno has four markings: Freckled, Merle, Underbelly, and Throated!
When adding your markings you will want to reference each marking's individual guide. For a list of these guides
Check out our full Markings and Mutations List here!
When adding your markings you will want to reference each marking's individual guide. For a list of these guides
Check out our full Markings and Mutations List here!
|
First I decided to add our Merle marking!
|

|
|
Next up I added Underbelly!
Take note that our markings are sitting on top of our nuances. Nuances should always be considered part of the base colors, and be covered by any markings the reepuls should have. |

|
|
Now we have our Freckled Marking.
|

|
|
And our final marking, Throated.
|

|
Step 5: Finishing Touches
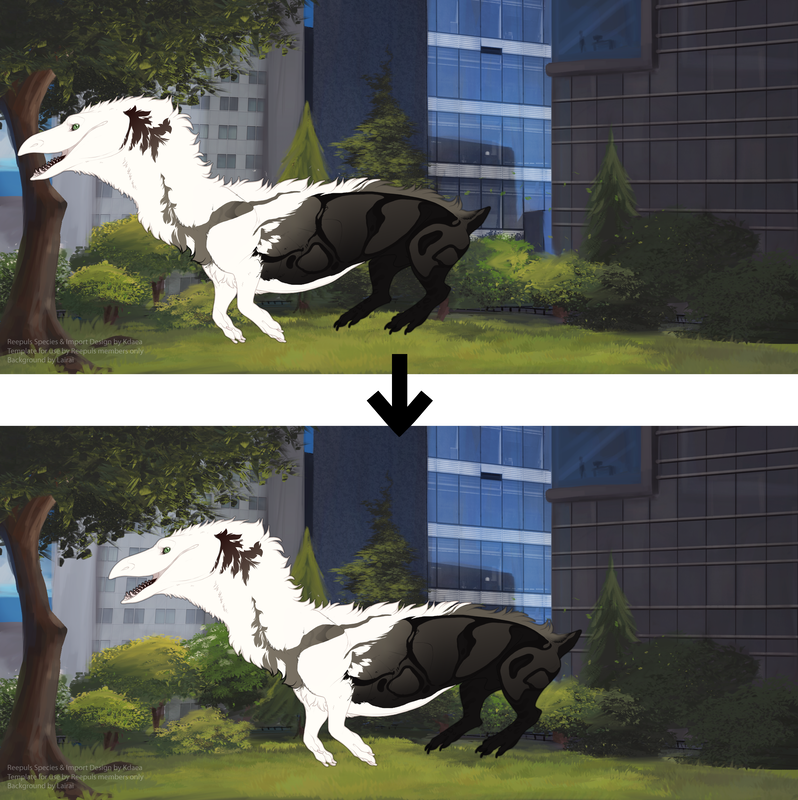
Now that our reepuls has her markings, it's time for all the finishing touches!
This includes coloring our reepuls's Eyes, Mouth, Claws, and Paw Pads.
As well as coloring our lineart, possibly adding a halo, and choosing our background!
This includes coloring our reepuls's Eyes, Mouth, Claws, and Paw Pads.
As well as coloring our lineart, possibly adding a halo, and choosing our background!
I've gone ahead and given our girl her final design touches! Make sure to check out our Guide to Coloring Eyes, Flesh, & Nails!
|
Coloring your lineart is a great way to truly make your design shine!
|

|
|
Halos are subtle outlines around your reepuls. And can help them stand out against their backgrounds.
|

|
Backgrounds will determine where your reepuls live. Whether Forest, Mountain, Desert, Coastal, or City life is for them!
Each region has two starting backgrounds to choose from, and are located in the import files.
If you would like to learn more about these regions visit our World/Regions Page!
Each region has two starting backgrounds to choose from, and are located in the import files.
If you would like to learn more about these regions visit our World/Regions Page!
Position
Lastly, you may also choose to move your reepuls slightly on the import. For example to center a tailless
or frog tailed reepuls on their import.
or frog tailed reepuls on their import.
However, moving them into unnatural positions on the import will not be allowed.

